Adding Xero to Safe Sender List for Outlook
If you did not receive the verification email from Xero and have checked your spam and junk mail folders but couldn’t find it, follow these steps to add Xero to your safe sender list. This will ensure that you receive all future emails from Xero directly in your inbox.
For Microsoft Outlook, safe sender list can be configure through Outlook Apps or Outlook Online. For Instruction for Outlook Online please click here.
Adding an Email to the Safe Sender List in Microsoft Outlook Apps
Step 1
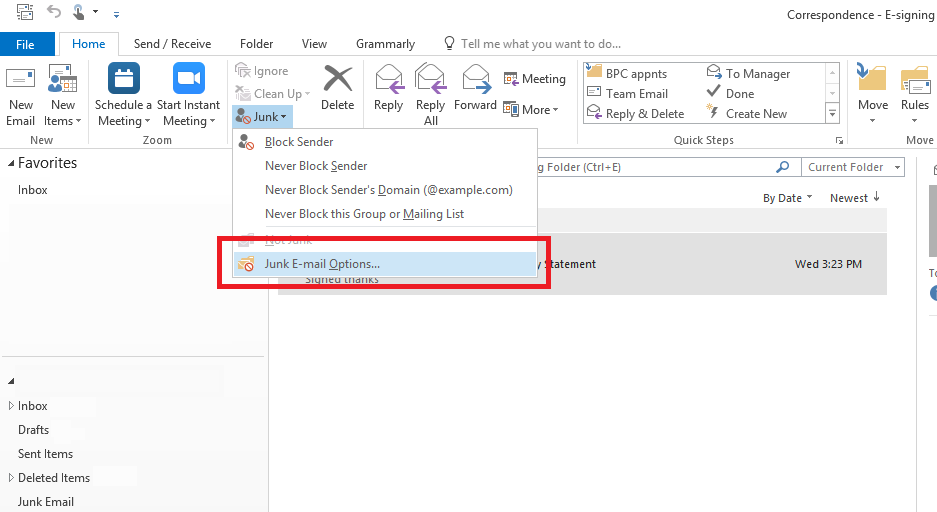
Locat the Junk icon on the toolbar, then select ‘Junk E-Mail’ Options from the dropdown menu.
Step 2
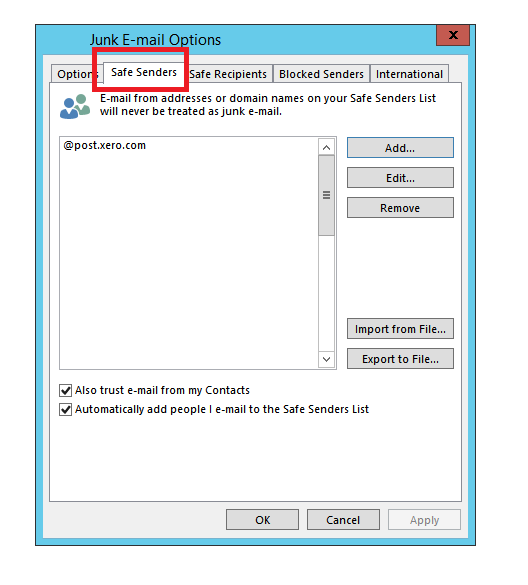
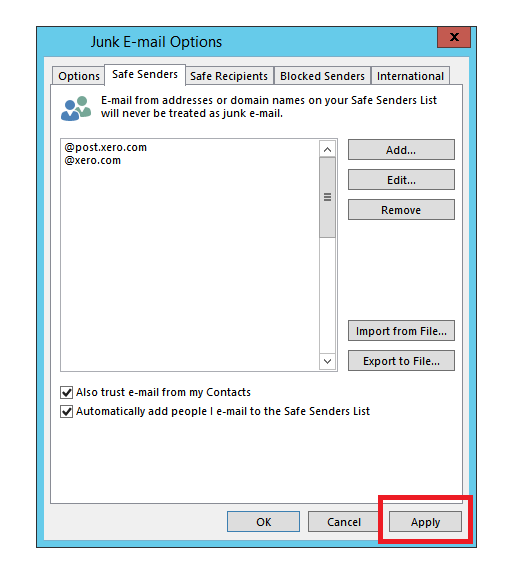
Select ‘Safe Senders’ in the pop up window.
Step 3
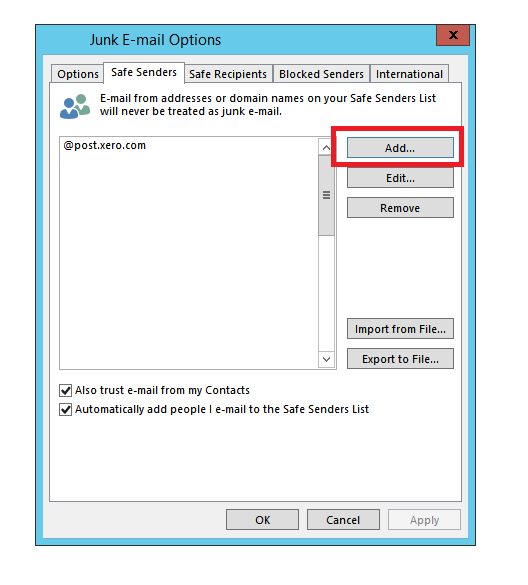
Select ‘Add’.
Step 4
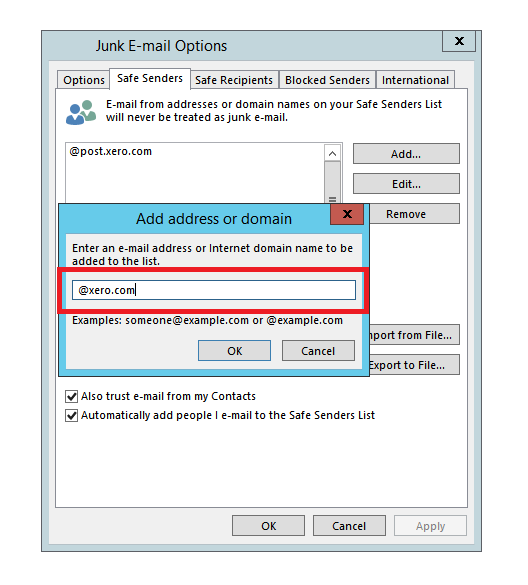
Add @xero.com and then select ‘OK’.
Step 5
Click on ‘Apply’.
You have now added xero to you safe sender list. Redo the account sign up process, and the verification email from Xero should come through now.
Adding an Email to the Safe Sender List in Microsoft Outlook Online
Step 1
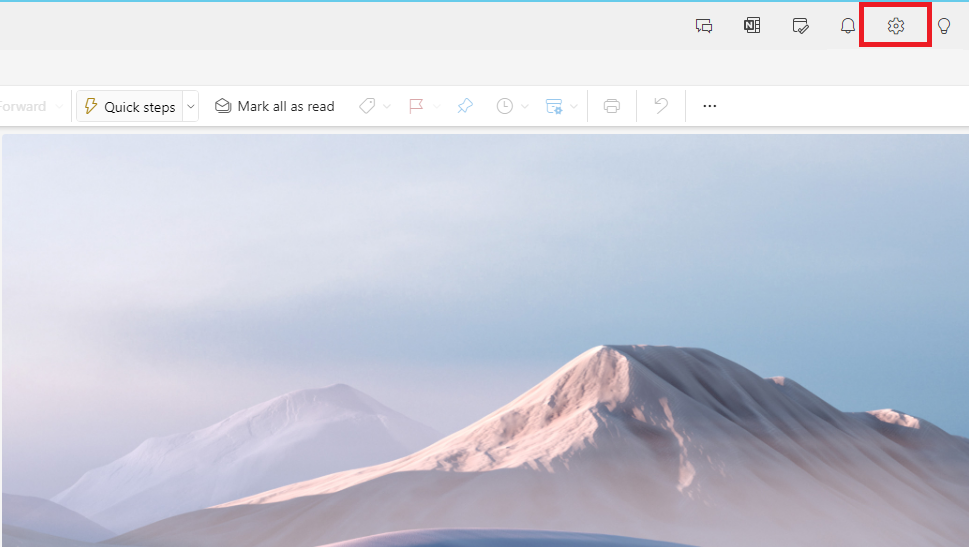
Click on the gear icon to open up email settings.
Step 2
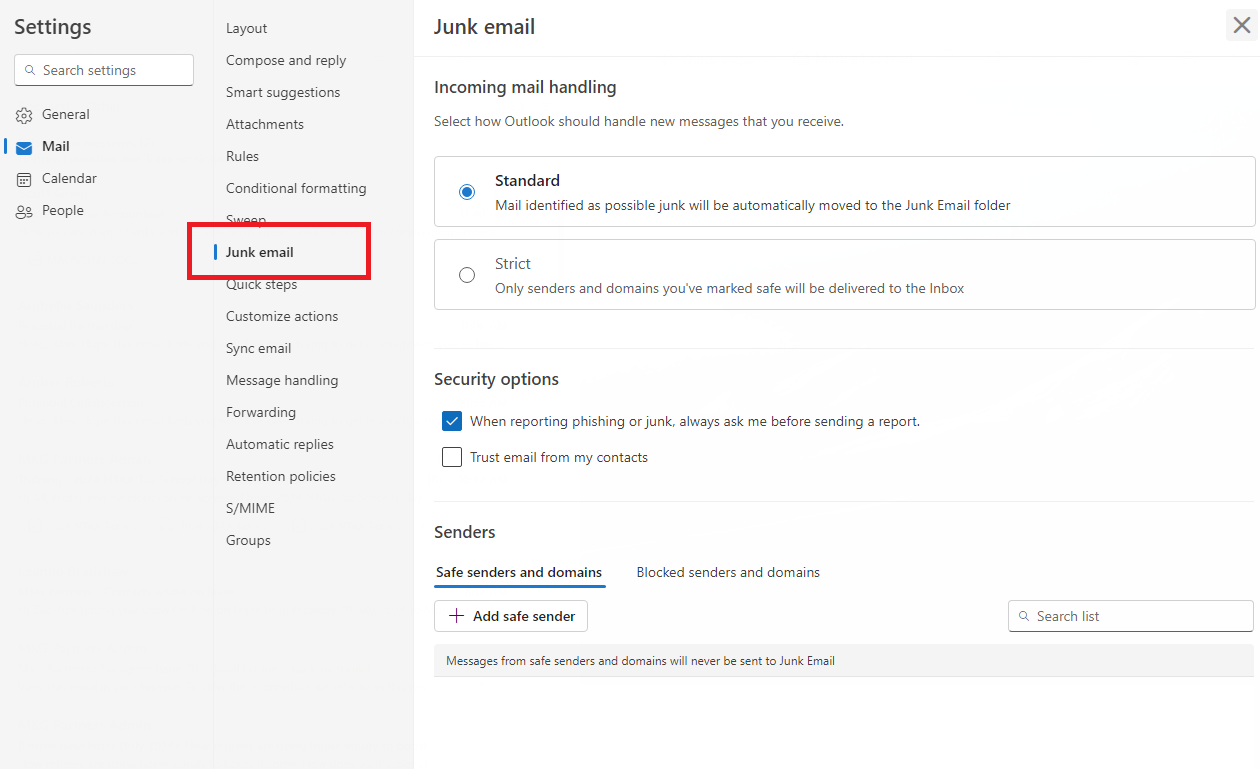
Navigate to the ‘Junk email’ tab.
Step 3
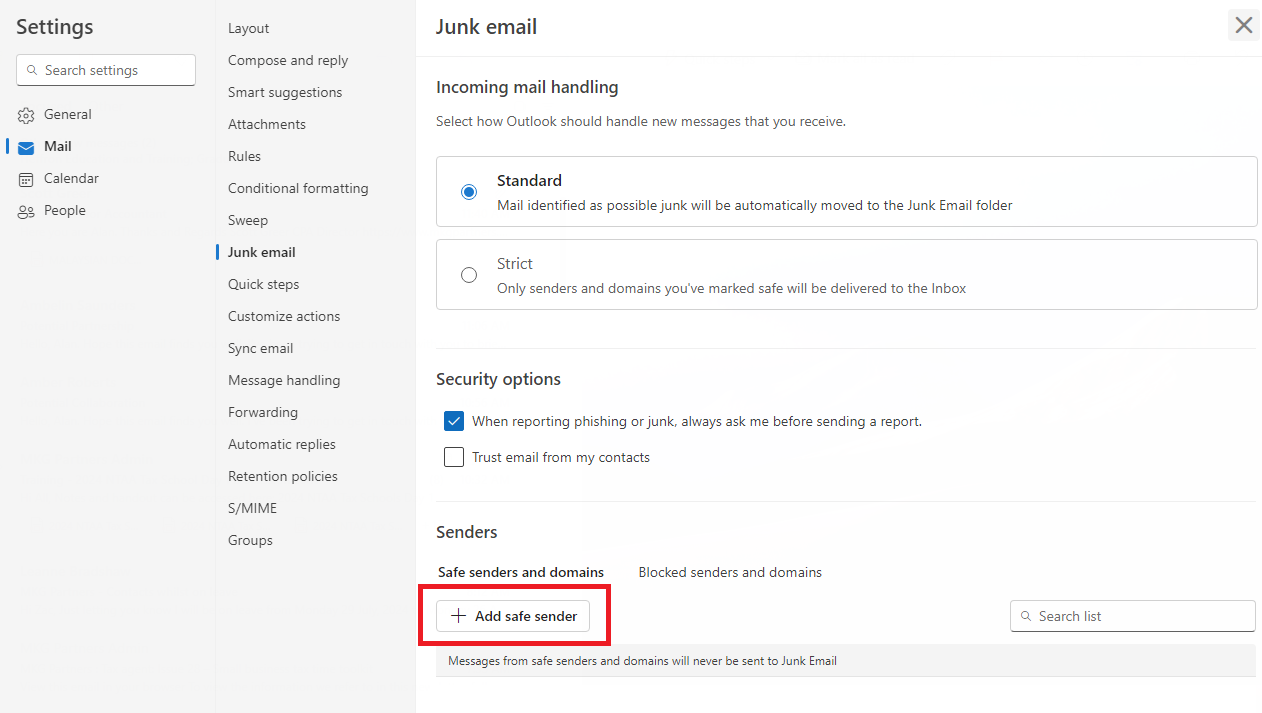
Select ‘Add safe sender’.
Step 4
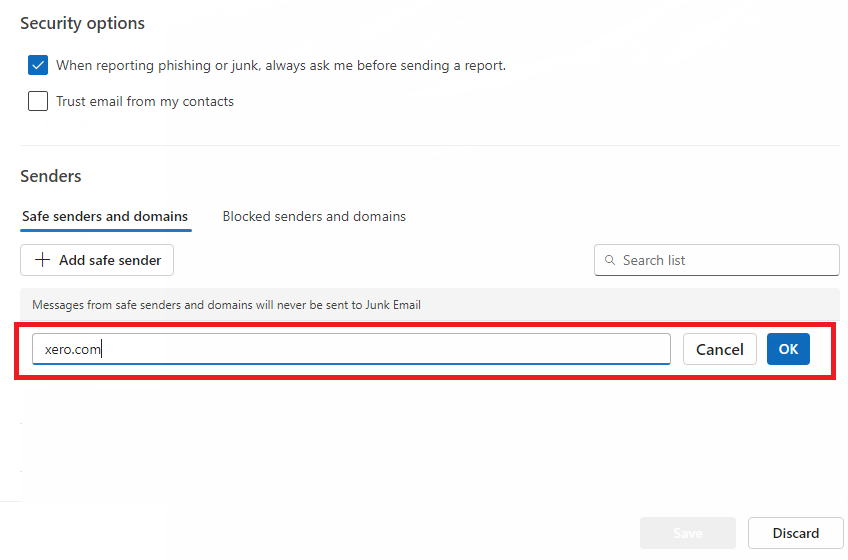
Enter xero.com into the form and then select ‘OK’.
Step 5
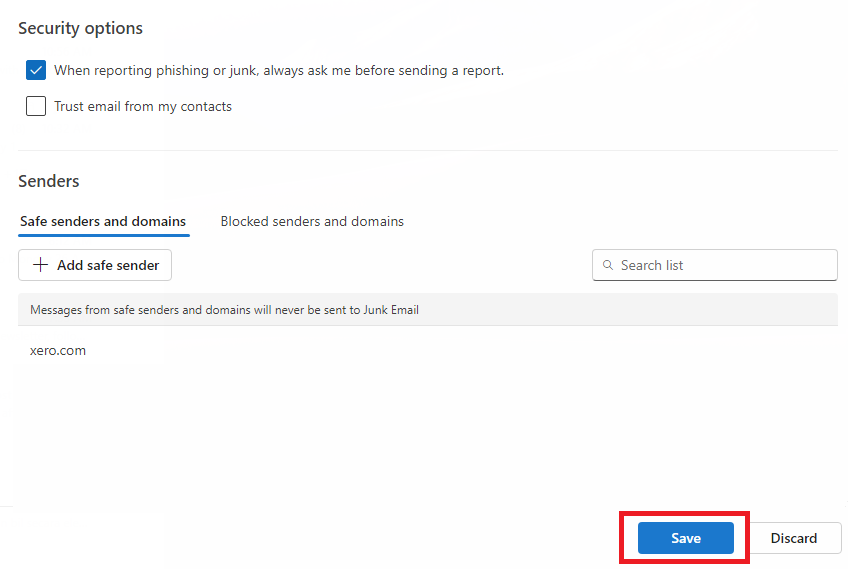
Click ‘Save’.
Click on the Xero link again in your email to proceed with signing up for a Xero account, and the verification email should arrive shortly. Do not hesitate to contact our office should you require help with this.


